What is Adho Mukha Svanasana / Downward Facing Dog?
Adho Mukha Svanasana (Downward-Facing Dog Pose) is a foundational yoga posture. It is an inversion asana, often practiced as part of a flowing sequence of poses, especially Surya Namaskar. The name comes from the pose’s similarity to the way a dog stretches when getting up. The Sanskrit name is from ‘adhas’ meaning “down”, ‘mukha’ meaning “face”, ‘svana’ meaning “dog” and ‘asana’ meaning “posture” or “seat”.
From Sanskrit to English:
Sanskrit pronunciation: Adho Mukha Svanasana (AH-doh MOO-kah shvah-NAHS-anna)
Meaning: adho = downward; mukha = face; svana = dog. This posture is therefore known in English as Downward Facing Dog, Downward Dog or Down Dog.
Looking for Yoga Teacher Training, click here.
Benefits of the Adho Mukha Svanasana pose
Adho Mukha Svanasana is a foundational asana (pose) and is part of the surya namaskara (sun salutation). Here are some of the benefits of practising this pose:
+ Strengthens wrists, shoulders, arms
+ Stretches back, hamstrings, calves
+ As a light inversion, it calms the brain and reverses the energy flow
+ Prepares body for arm-balancing poses & inversions
Yoga for every BODY
Adho Mukha Svanasana is meant to serve as a transitional resting pose during the Ashtanga Yoga practice; a moment to deepen the breath between postures and restore energy. That said, it may be challenging for beginners who are still working on building up their strength and flexibility; but even for more advanced students – depending on their body types, time of the day, or life moment they may be going through. We are all different, which is why the notions of “perfection” and “imperfection” don’t apply in yoga. The practice is an invitation to listen to our body, understand how it operates and what its needs may be. Each of us should be working on developing a personal practice, one that feels truly yours. Stay with us! While we will first explore how to perform a “standard” Adho Mukha Svanasana, we will then provide a series of modifications in order for you to tailor the pose to your individual needs.
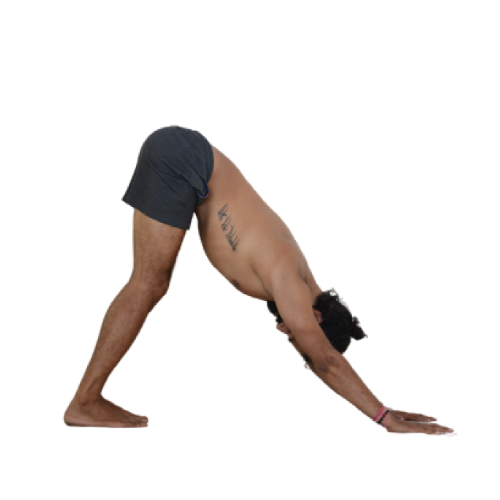
Standard Adho Mukha Svanasana
1. Come on all fours. Make sure your knees are directly below your hips and your wrists are directly below your shoulders. Spread your fingers, your index finger should follow the line of your wrist.
2. Tuck your toes, press into your fingers and lift your knees away from the floor.
3. Lengthen your tailbone and send your sitting bones toward the ceiling. Your arms should be straight at this stage.
4. Push your thighs back, rolling them slightly inward, straighten your knees and send your heels towards the floor.
4. Firm the outer arms to avoid internal rotation, protract your shoulder blades and send them towards your tailbone. Keep your head in line with your spine..
5. Your body should form an inverted V. That is, one straight line from your wrists up to your tailbone, and another from your tailbone down to your heels.
Modification 1: Lifting the front of your body
When practising Adho Mukha Svanasana you feel that the majority of your weight is being sent towards your hands, causing you to feel a lot of pressure on your wrists? This is probably due to a lack of flexibility in your shoulders, back and/or hamstrings. Using props to lift the front part of your body will enable you to shift your weight back and alleviate pressure on your wrists.
A
B
C
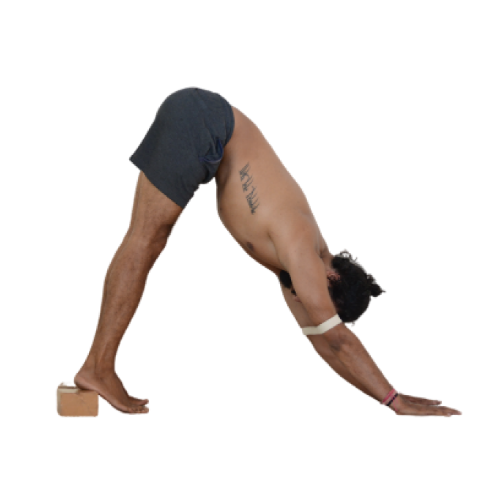
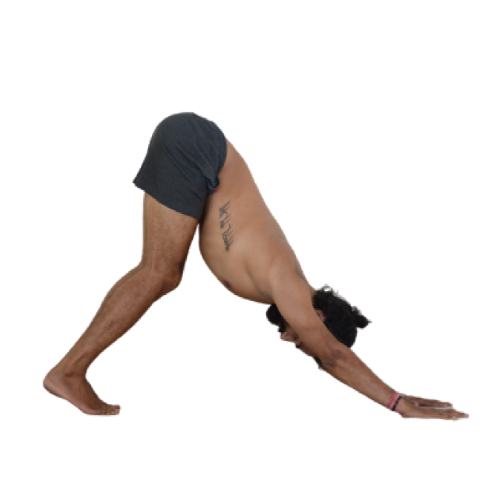
1. Set up a wedge, its longer side parallel to the front of your mat. Place your hands on the higher part of the wedge, spread and stretch your fingers, and step back into Adho Mukha Svanasana. Make sure to press the palms of your hands and pads of your fingers towards the ground, sending the shoulders away from the ears. Using a wedge will prevent you from feeling pain in your wrists as it reduces wrist joint extension (see picture A)
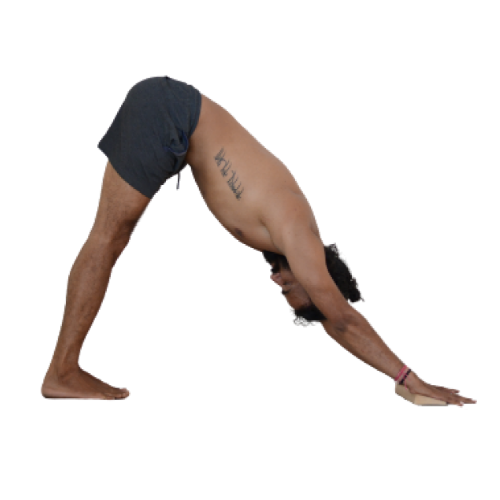
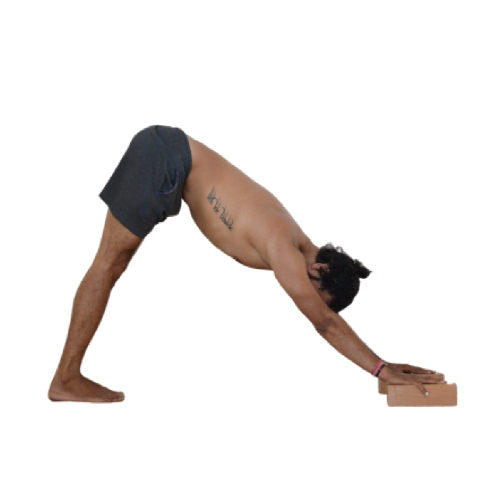
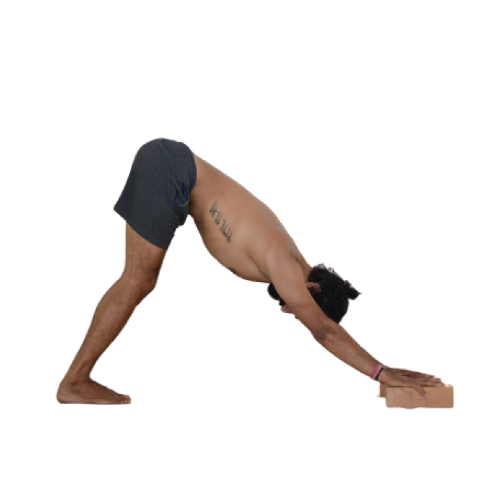
2. Need more height? Grab a pair of blocks and set them flat and lengthwise toward the front of your mat. Arrange them so that they are shoulder-distance apart and parallel. Place your hands on the blocks, spread and stretch your fingers and step back into Adho Mukha Svanasana. Press the palms of your hands and pads of your fingers into the block, sending your shoulders away from the ears (see picture B)
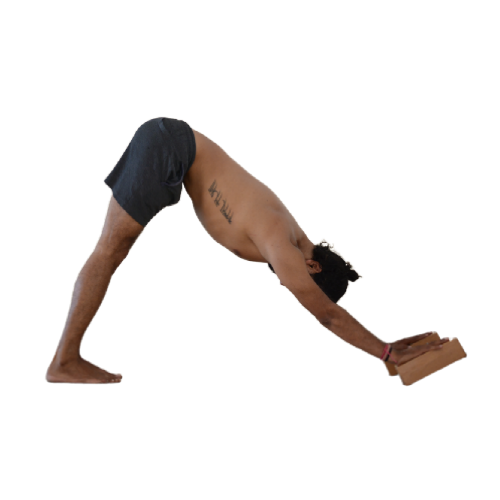
3. For even further support, you can place two blocks lengthwise on your mat, slanted against the wall, and arranged so that they are shoulder-distance apart and parallel to each other. Place your hands on the blocks, spread and stretch your fingers and step back into Adho Mukha Svanasana. Press the palms of your hands into the block, sending your shoulders away from the ears (see picture C)
Modification 2: Supporting the back of your body
Your heels simply won’t come down no matter how much you try? Your back is rounding? This occurs when having tight ankles, hamstrings and/or perhaps buttocks. Placing a prop underneath your feet will provide support for the back side of your body, enabling you to deepen the pose by lifting your hips and keeping your back straight. Remember that yoga is all about the spine, so make sure to keep it safe.
D
E
1. Arrange a pair of blocks at the end of your mat, longer size parallel to the edge of your mat. Adjust a strap so that it’s shoulder-distance and place it around your upper arms. This will enable you to keep your shoulders in place and provide further relief. Get on all fours and place your feet against the blocks so that your heels may land above. Push into your hands and get into Adho Mukha Svanasana (see picture D).
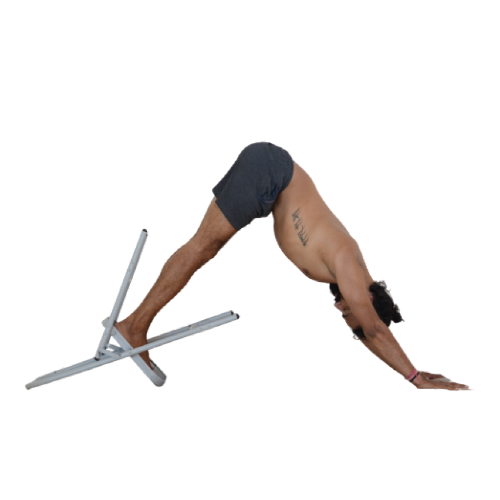
2. For further support, set up a chair upside down at the end of your mat. Get on all fours, place your toes on against the back of the seat. Push into your hands and get into Adho Mukha Svanasana (see picture E)
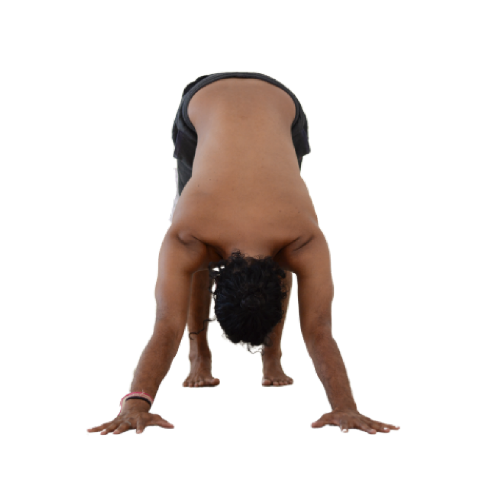
Modification 3: Bending the knees
You can’t keep your legs straight? When you try, you feel a lot of tension in your body and you feel your back is rounding? Please, drop the perfection – just bend your knees!
F
G
H
1. If this is available to you, bend your knees keeping your heels down (see picture F)
2. When bending your knees, your weight is falling towards the front? Do you feel too much pressure on your wrists? Place your hands on a pair of blocks. (see picture G, refer to adaptation 1 for further instructions).
3. When bending your knees, you feel too much pressure on your knees? Your heels won’t naturally come down? Keep them up! (see picture H)
Modification 4: Tilting the hands
Adho Mukha Svanasana wants us to place our wrists in such a way that our index finger should be straight and parallel to the longer side of our mats. For some of us, this may feel very uncomfortable, especially at the beginning.
I
J
K
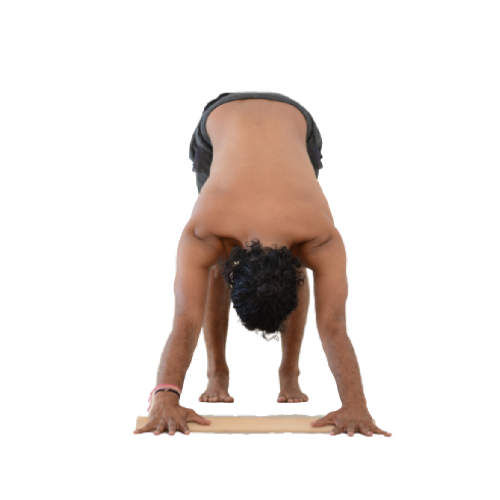
1. If your shoulders are tight or you have tightness in the Latissimus Dorsi muscle (restricting the external rotation in your upper arms) you can tilt your hands slightly towards the outside but make sure your index fingers are parallel to each other. Keep pressing your thumb and index fingers gently to avoid external rotation in your forearms. It will help you to protract your shoulder blades and allow you to stretch your latissimus Dorsi muscle. (see picture I).
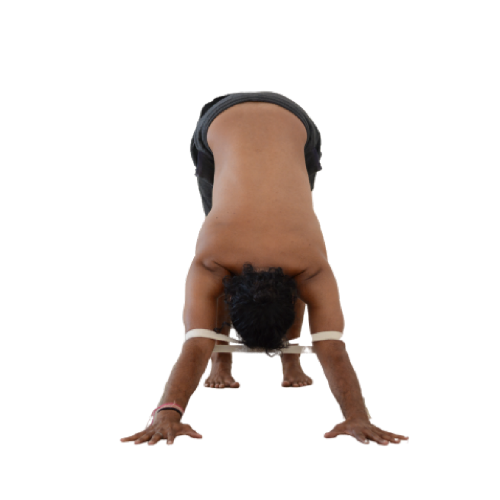
2. For additional support, adjust a strap so that it’s shoulder distance and place it around your upper arms. Tilt your hands slightly towards the outside and get yourself into Adho Mukha Svanasana (see picture J).
3. In order to get yourself used to placing your wrists correctly, you relieve the pressure on your wrists by placing a wedge beneath your palms (see picture K).
Interested in becoming a yoga teacher?
Newsletter
Upcoming events and latest blogs