From Sanskrit to English
Sanskrit pronunciation: Utthita Hasta Padangusthasana (oo-tee-tah ha-stah PAH-DAHN-goos-TAH-sah-nah)
Meaning: utthita = extended ; hasta = hand; pada = foot, leg ; angustha = thumb, toe
Most commonly known in English as Extended Hand to Big Toe Pose this pose is categorized in three parts A, B, C.
Benefits of Utthita Hasta Padangusthasana
+ Strengthens the feet, legs, core and shoulders
+ Stretches the hips and the back of the legs
+ Improves balance and concentration
Yoga for every BODY
Utthita Hasta Padangusthasana A, B and C are very powerful poses. If balance and flexibility are still something you are working on, keep in mind that what we want to prioritize here is the spine, as always. Before focusing on how high your leg should be, you want to make sure your hips and shoulders are aligned, that the foot of the standing leg is facing front and that your chest is nice and open. If any of those are getting compromised, or if you need a refresher of what this pose should feel like, we highly recommend going through the explanations and modifications provided below.
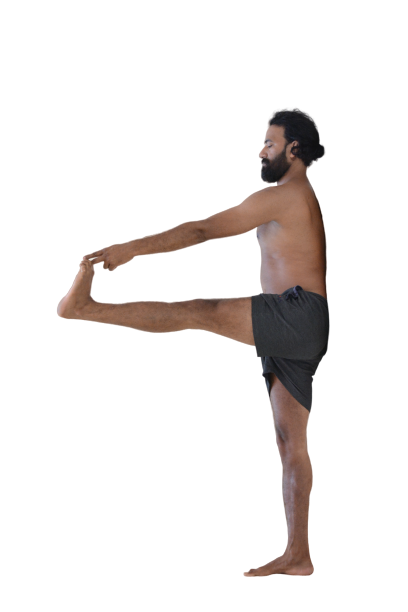
Standard Utthita Hasta Padangusthasana A
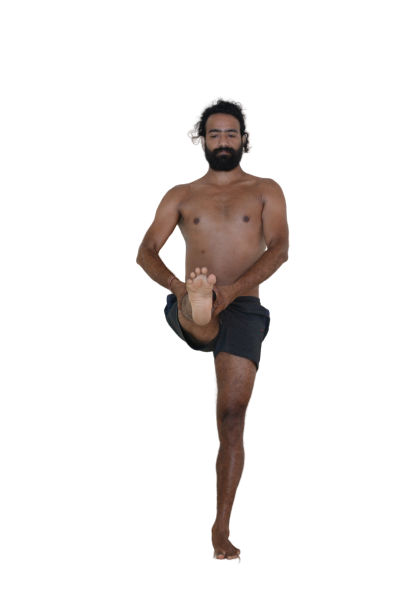
1. From Tadasana, shift your weight towards what will become your supporting leg. Bend the other leg, sending your knee towards your chest.
2. Rooting down through your supporting leg, hold onto the big toe of the opposite leg with the corresponding hand using a yogi toe lock. Then extend that leg towards the front. Make sure your alignment is correct: you want your hips and shoulders to be aligned, and your spine to be nice and tall.
3. Lengthen your spine, open your chest, and bend forward towards your front leg.
4. If you are practicing Ashtanga, stay here for five breaths, and then continue onto Utthita Hasta Padangusthasana B and Utthita Hasta Padangusthasana C before switching legs. if you are practicing Hatha Yoga, release the pose, and switch legs.
Modification 1: Stick to Step 1
If you’re still working on your balance and flexibility, stick to step 1 of Standard Utthita Hasta Padangusthasana A.
A
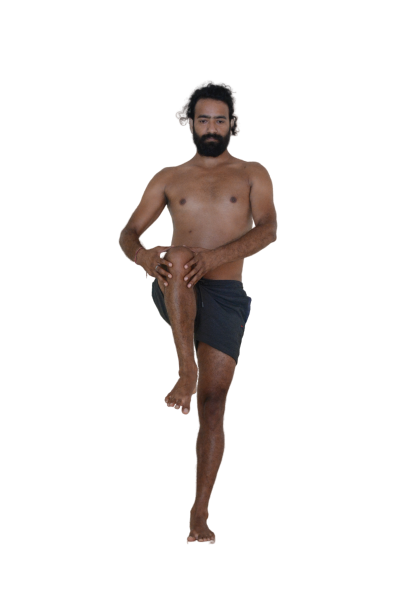
1. From Tadasana, shift your weight towards what will become your supporting leg.
2. Rooting down through that supporting leg, bend the other leg, sending your knee towards your chest.
3. Hold onto your knee with both hands, keep your spine tall and work on your balance.
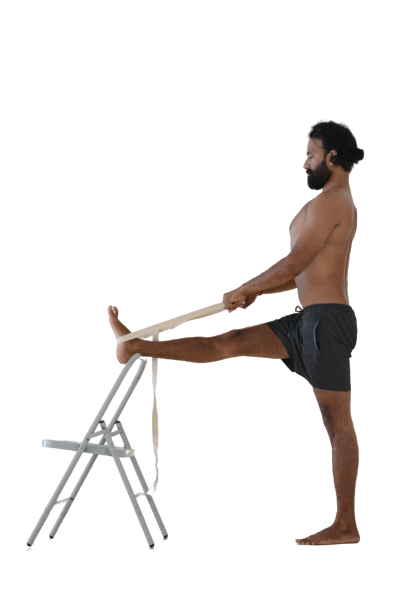
Modification 2: Using a Chair and a Strap
Using a chair and a strap can help you feel supported. In addition, it can enable you to work on your alignment without losing your balance as much as you might without props.
B
C
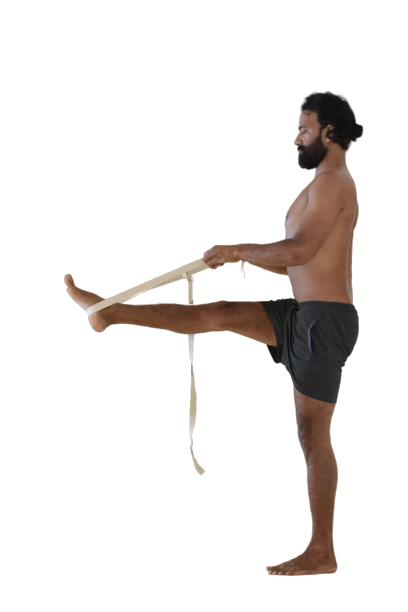
1. Loop a strap and set up a chair. Stand behind the chair, leaving about a leg distance between you and the chair (see picture B).
2. From Tadasana, shift your weight towards what will become your supporting leg. Bend the other leg, sending your knee towards your chest.
3. Place the strap beneath your foot, hold onto it with both hands, and extend your leg (adjust the strap accordingly), placing your ankle on the top rail (see picture B). Make sure your shoulders are aligned, your back is straight (or parallel to the wall if you are standing in front of a wall) and your elbows are slightly bent.
4. Once you are comfortable here, you can try repeating steps 2 and 3 without using the support of a chair for your ankle.
Modification 3: Using a wall
Using a wall requires more stability and strength compared to using a chair and/or a belt. Yet the wall is a good indicator of your alignment. This picture was shot a few seconds before Devvrat got into the pose. That’s why you’ll probably notice that his shoulder is not resting on the wall, but that’s where it should be for you when practicing this modification! For this, follow steps for Standard Utthita Hasta Padangusthasana A while gluing your spine to a wall.
D
Modification 4: Working on Final Pose with Props
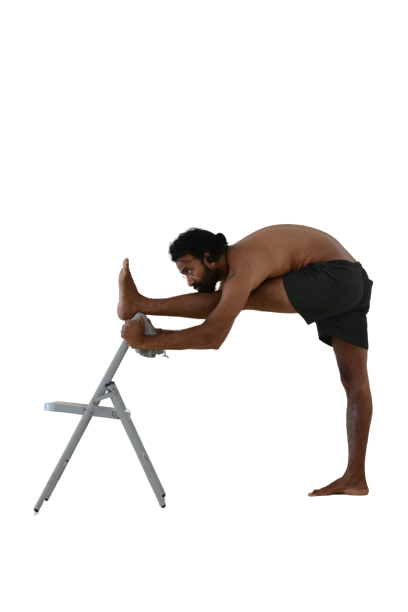
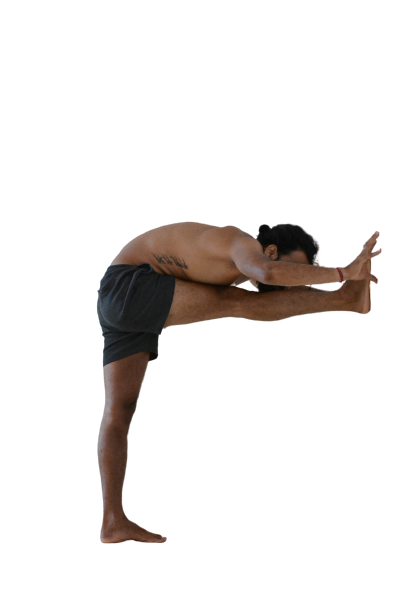
Balance certainly is a challenge in Utthita Hasta Padangusthasana. And that is true even when being close to the final expression of the pose. Once again, using a chair, and eventually a wall, can certainly be helpful.
E
F
1. Set up a chair and stand behind it, leaving about a leg distance between you and the chair (see picture E).
2. From Tadasana, shift your weight towards what will become your supporting leg. Bend the other leg, sending your knee towards your chest.
3. Rooting down through your supporting leg, hold onto the big toe of the opposite leg with the corresponding hand using a yogi toe lock. Then, extend the leg towards the chair, placing your ankle on the top rail for support (you may want to place a blanket underneath your ankle, see picture E).
4. Lengthen your spine, open your chest and lean towards your front leg, holding onto the chair’s top rail (see picture E).
5. For further challenge, repeat steps 1, 2, 3 using a wall for support instead of a chair. You want to push your front foot and fingertips into the wall (see picture F).
Standard Utthita Hasta Padangusthasana B
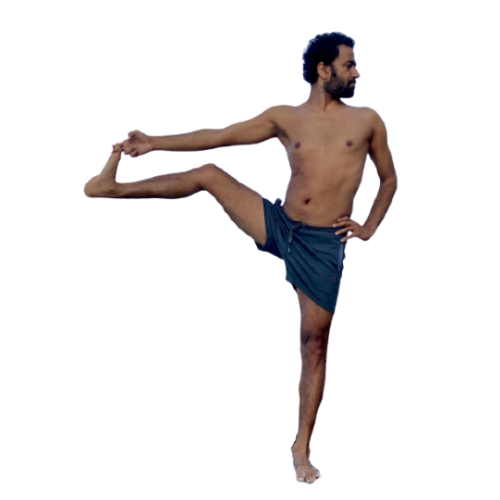
1. In Ashtanga Yoga, since you would’ve started from Utthita Hasta Padangusthasana A with the right leg, you should send that same leg to the right while still grabbing hold of your right big toe with your index, middle finger and thumb.
2. Keeping your spine straight, your hips parallel to your shoulders, and your left arm on your left hip, look towards the left and stay there for five breaths before proceeding to Utthita Hasta Padangusthasana C.
* In Hatha Yoga, it is very unlikely that you will get into this pose without passing by Utthita Hasta Padangusthasana A first. You may start with the left leg however, and the number of breaths may be reduced or increased depending on your practice. After you release the pose, switch legs.
Modification 5: Bending the Knee
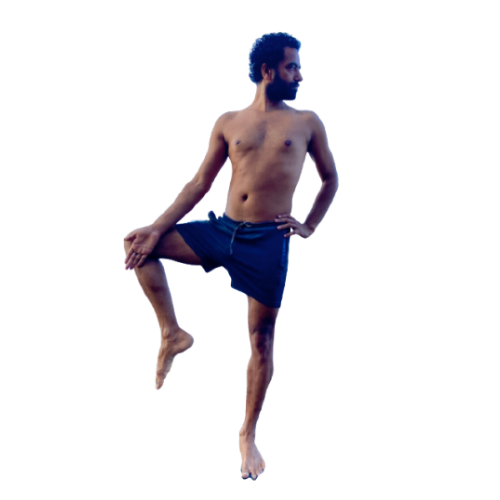
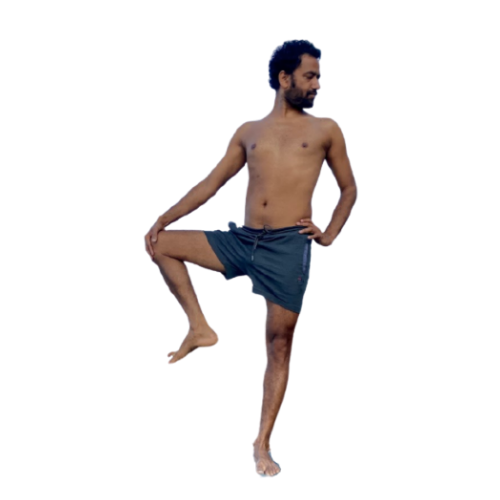
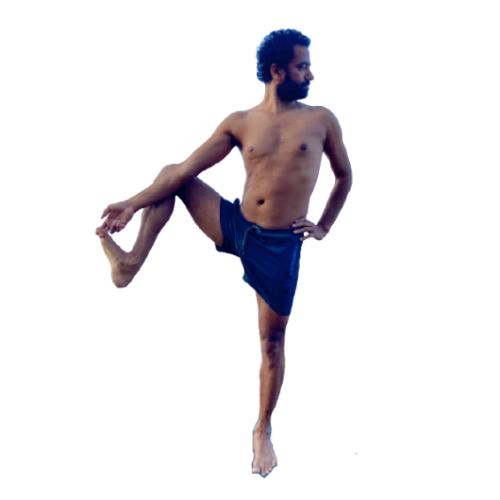
If you have difficulties extending the leg to the side, if this leads you to lose your balance or alignment, simply bend your knee open to the side. Keeping your palm open against the knee may help you open your hip (see picture G). Holding onto the knee with your hand may help you lift your leg higher up and work on flexibility (see picture H). Once these alternatives feel easy for you, you can attempt holding onto your foot with a yogi toe lock, keeping your knee bent (see picture I and J). Choose how much you want to extend your leg based on what feels right for you in this moment.
G
H
I
J
Modification 7: Using a Strap
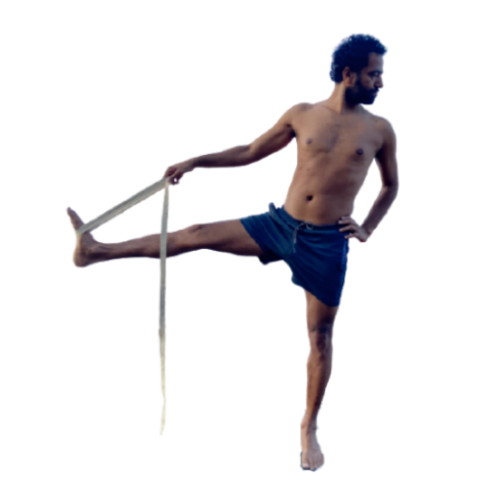
If flexibility and / or balance still represent a challenge for you, looping a strap around your foot and holding onto it, may help you get a feel of the pose while maintaining a correct alignment.
K
1. From Tadasana, shift your weight towards what will become your supporting leg. Bend the other leg, sending your knee towards your chest.
2. Rooting down through your supporting leg, loop a strap around the foot of your raised leg, hold onto the strap, and extend your leg towards the front (you may need to adjust the width of the loop).
3. When you find the balance needed, place your other arm on the corresponding hip and open to the side (make sure the foot of the standing leg remains parallel to the shorter edge of your mat).
4. Keep your spine long and send your gaze in the opposite direction.
Standard Padangusthasana C
In Ashtanga Yoga start from standard Standard Padangusthasana B:
1. Come back to center with your leg, hold onto the foot with both legs, and raise your leg as high as you can towards your core. Stay here for five breaths.
2. Release the legs, place your hands on your hips and activate your bandhas to keep the leg straight and as high as possible for 5 breaths.
In Hatha Yoga, you can attempt this pose directly from Tadasana:
1. Shift your weight towards what will become your supporting leg. Bend the other leg, sending your knee towards your chest.
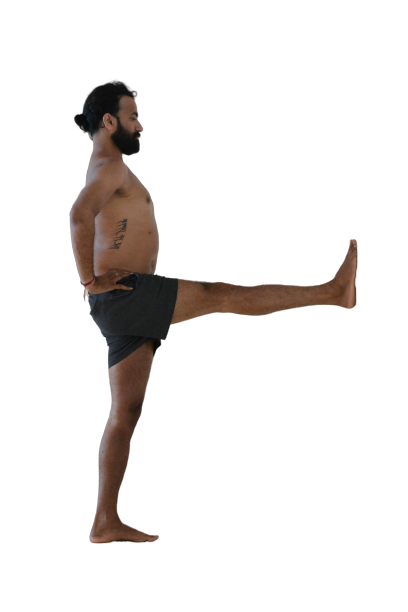
2. Rooting down through your supporting leg, extend the other leg towards the front. Your toes may be in dorsi or plantar flexion depending on the school of thought.
3. Make your hips and shoulders are aligned, and that your spine stays tall.
Modification 8: Using a Wall
If you struggle to keep your leg up, using a wall for support is a great idea. Indeed, pushing your foot into the wall will help you activate the muscles in your leg and enable you to focus on alignment, rather than balance. That way, you can use your hands to keep leveling your hips. (see picture L).
L
Modification 9: No Props
To increase the challenge, try not using the wall but holding onto your leg with both hands to keep it up. Make sure to keep your hips and shoulders leveled throughout (see picture M).
M
Interested in becoming a yoga teacher?
Newsletter
Upcoming events and latest blogs